Treatment machine dev (development) mode allows greater latitude in setting machine parameters. However, RTIMAGE files captured in dev mode lack some metadata (such as references to a plan, plan beam, and identity of the treatment machine) that the AQA platform requires.
The Series Maker allows you to convert these files into fully defined DICOM series that can be analyzed on the AQA platform.
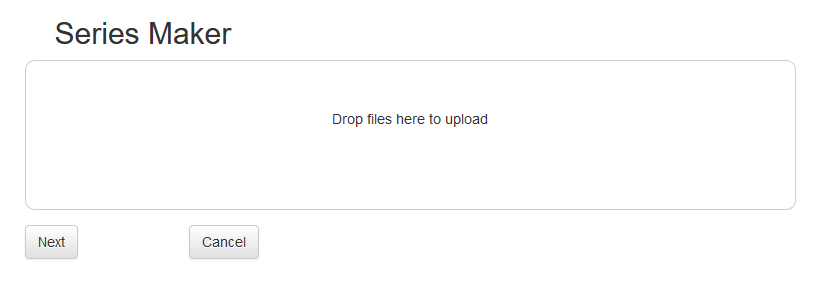
From the home page, click the Series Maker link. This will show the upload page:
Three types of DICOM files are needed to construct a new series:
From the home page, click the Series Maker link.
Note: It is recommended that before making series, that at least one set of production images be delivered and analyzed. This provides a default set of template images for the subsequent dev images.
Drag and drop the image files and optionally a plan file. Click 'Next' and a page similar to the one below will be shown:
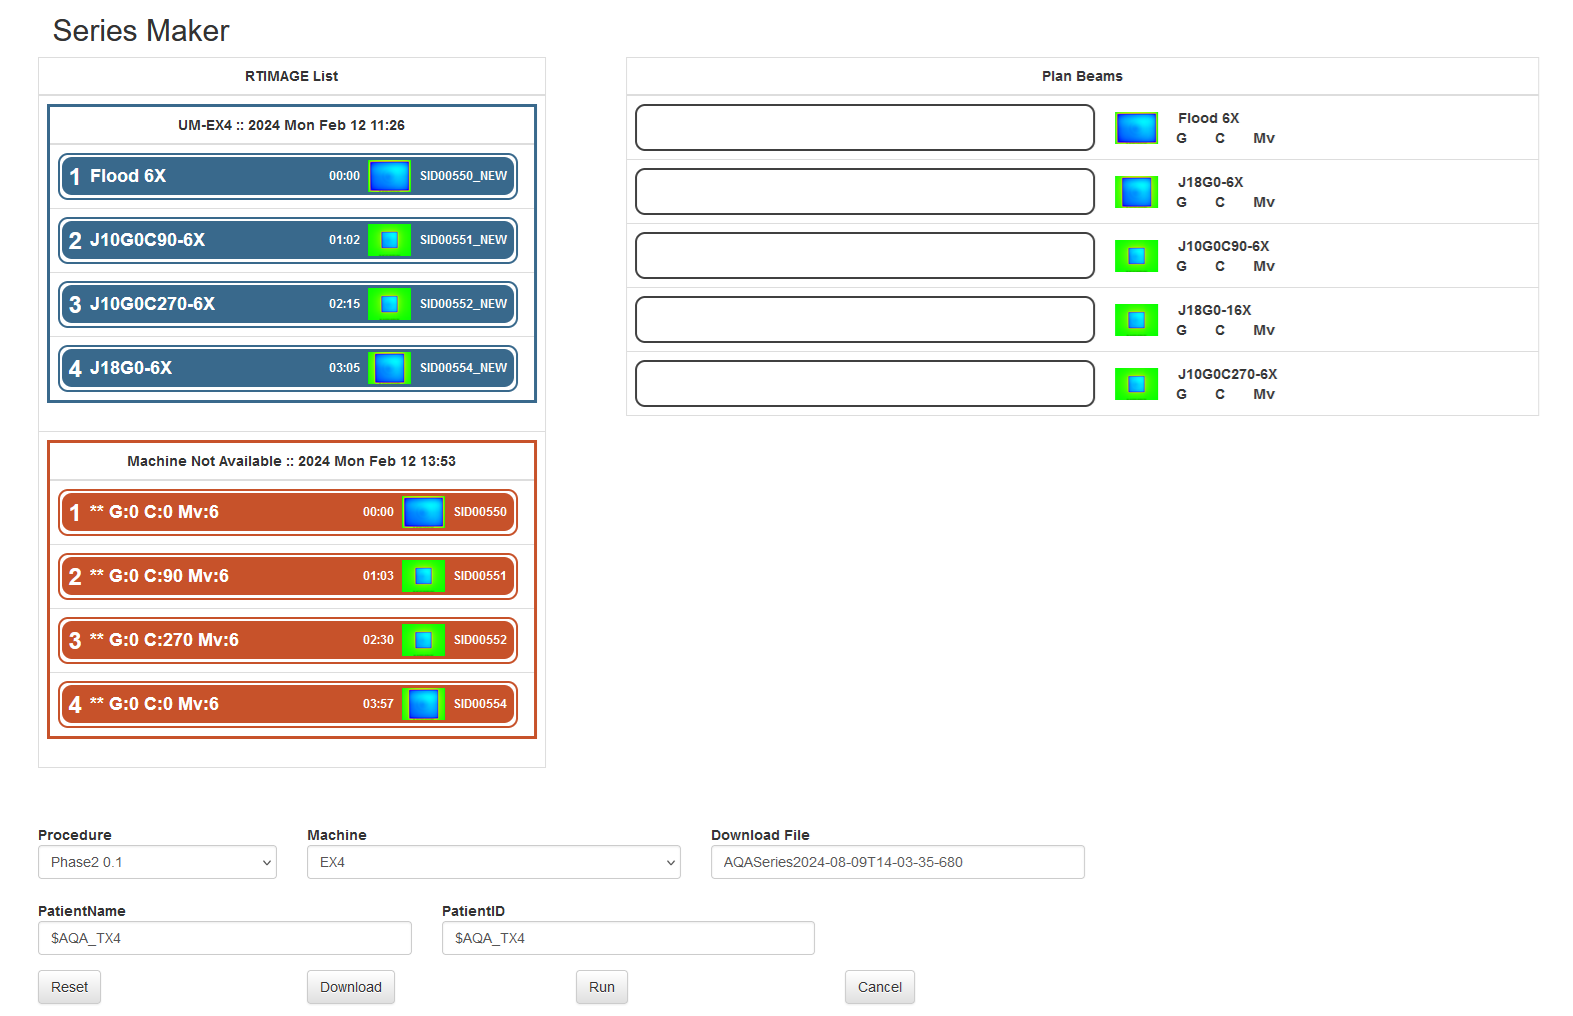
Image files are listed on the left, grouped by series. Open slots for plan beams are on the right. Drag the desired image into the appropriate plan beam slot.
Set the machine to the one that the image files were delivered on. The machine does not need to match the plan's machine, but it must match the collimator type of the plan's machine.
If the plan is already in the AQA database, then it will pick the Procedure for you. If not, then you must choose.
The PatientName and PatientID default to those in the image and plan, and can be overridden.
The 'Download File' is the name that will be given to the downloaded zip file. If helpful, change it to something that describes the data set.
Change the patient name and ID if appropriate. Often these reflect the machine name.
Clicking the 'Reset' button will reset the page to the initial values.
Clicking the 'Run' button will run the analysis.
Clicking the 'Download' button will make the series and download it to your computer as a zip file. The zip file can be extracted on your computer, or, can be uploaded (without unzipping) back to AQA via the Run Procedure link.
If the referenced plan is known to AQA, and is associated with a procedure (e.g. Phase2), then the interface will automatically choose that procedure. On the other hand, if the plan can not be associated with a procedure (if the plan was made in the user's treatment planning system), then it is the user's responsibility to choose the procedure.
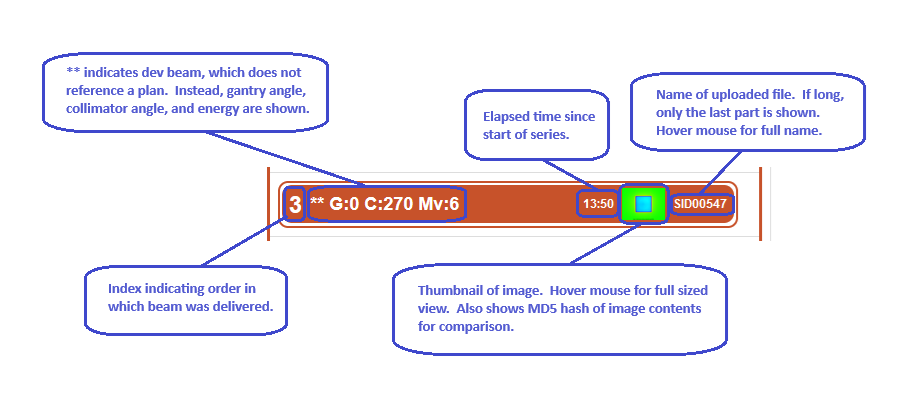
Within each series, the images are sorted in the order they were acquired. Each item represents an image and has the following information: